 "deviantcustoms: OEM++ builds" (deviantcustoms)
05/16/2018 at 10:30 • Filed to: None
 16
16
 9
9|
"deviantcustoms: OEM++ builds" (deviantcustoms)
05/16/2018 at 10:30 • Filed to: None | 16
| 9 |
Ahh, carbon fiber wet lay ups. Like a toxic but really hot on/off again girlfriend, you know she bad for you... but you keep coming back to her cos she so pretty.
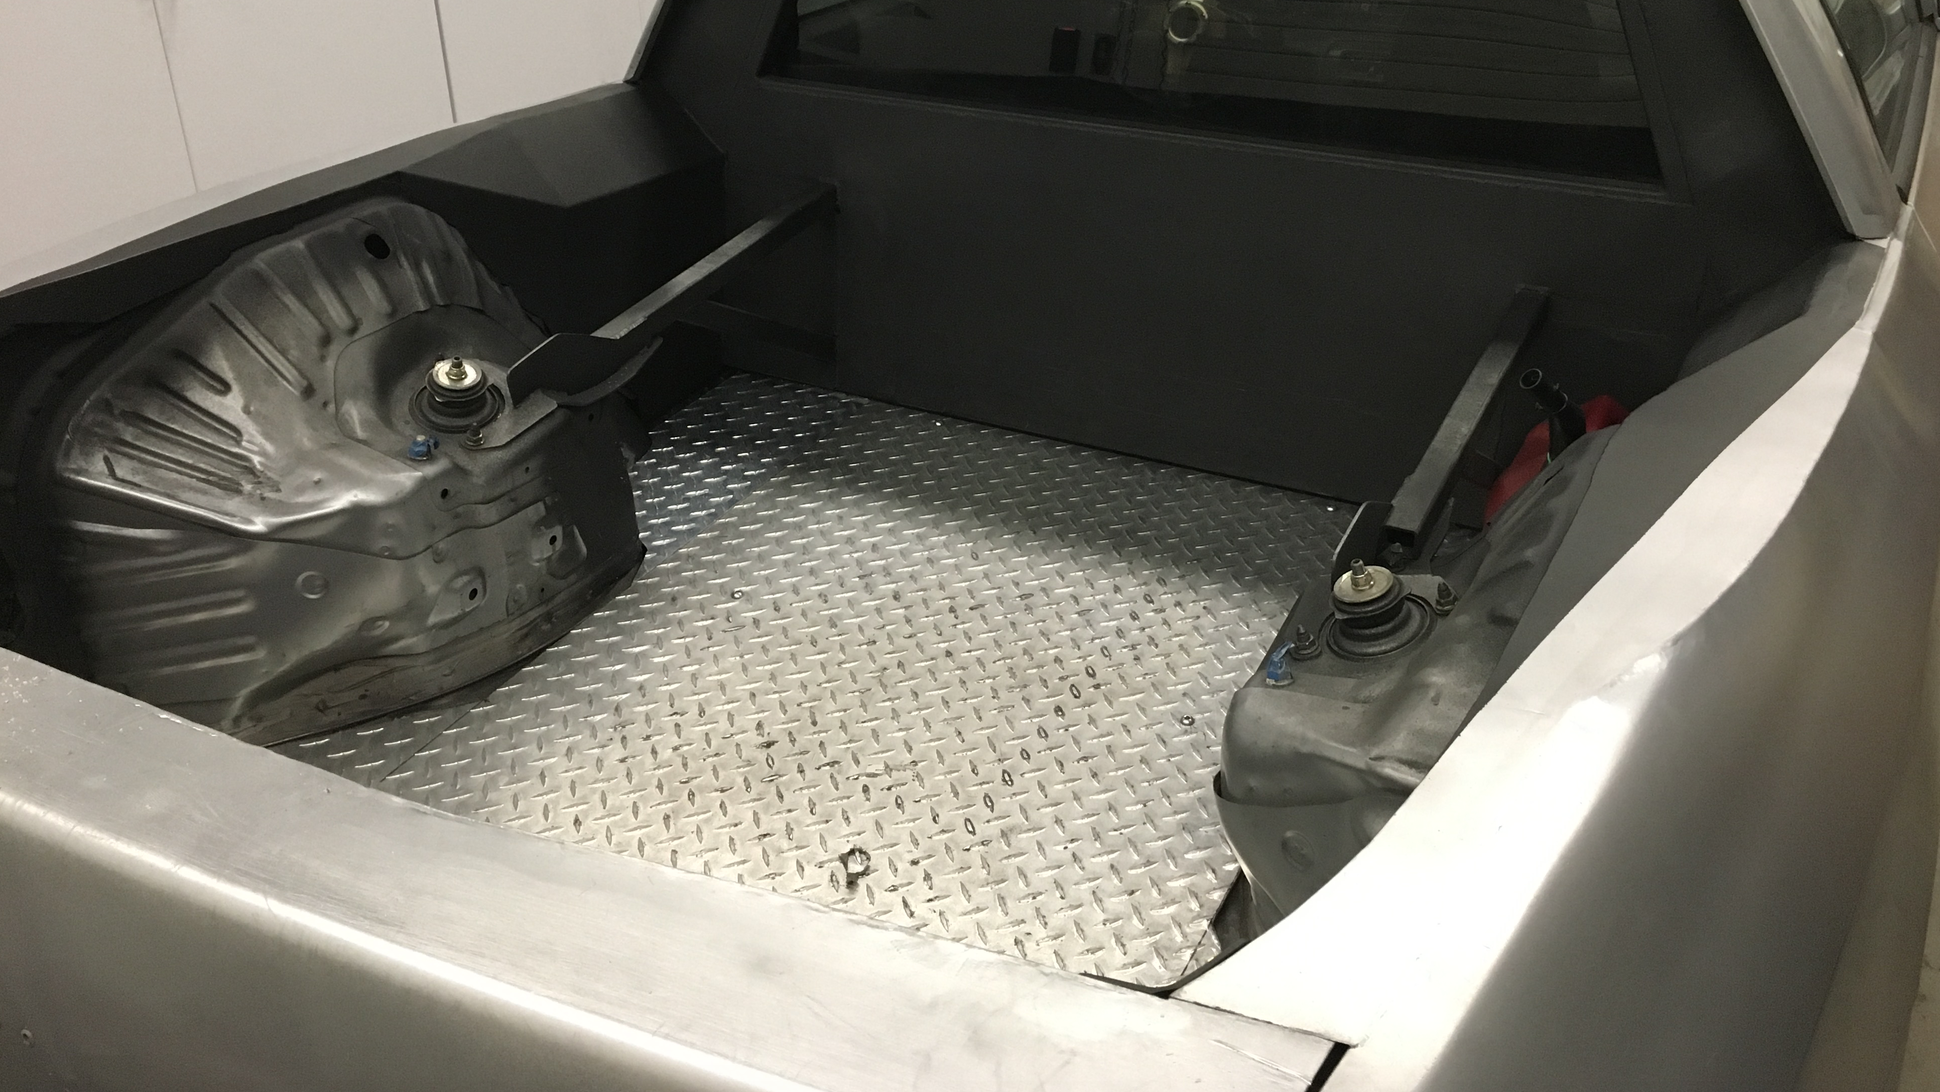
Most pickup conversion projects I’ve seen tend to close off the bed in a way that’s quite blockish, boxing up the wheel arches and other underlying structures with faceted enclosures. While it may look cleaner, I felt like doing something more “shrink-wrapped” to allude to the original sheetmetal, and to maximize the already limited space.
For each forward corner of the bed, I first made a matte board template with a single fold, then cut, folded and trimmed sheetmetal to the same shape.
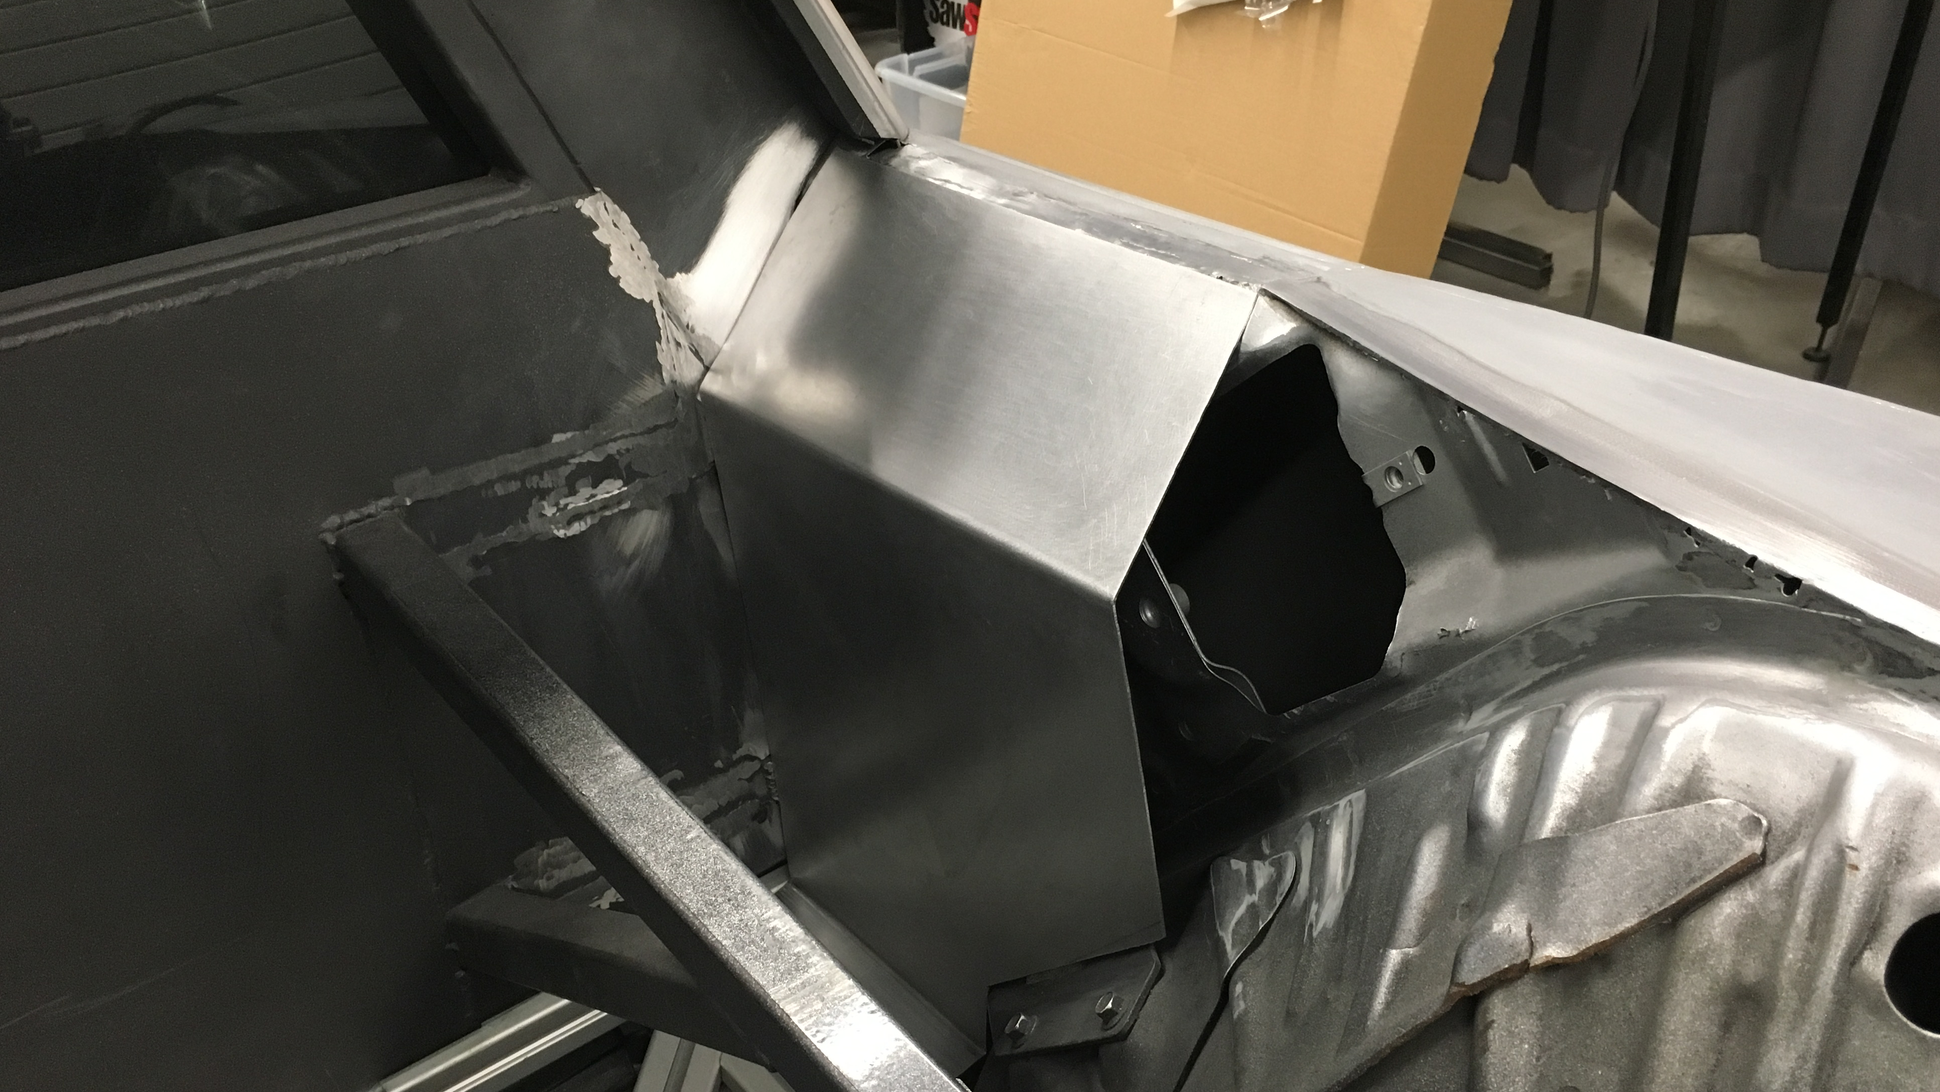
After tack welding the first piece, I made a second piece to join it up with the wheel arch. A lot of iterative trimming where it met the original sheetmetal; but if not for the experience recently gained from tackling the fender close-offs, this step would have felt even harder and taken even longer!
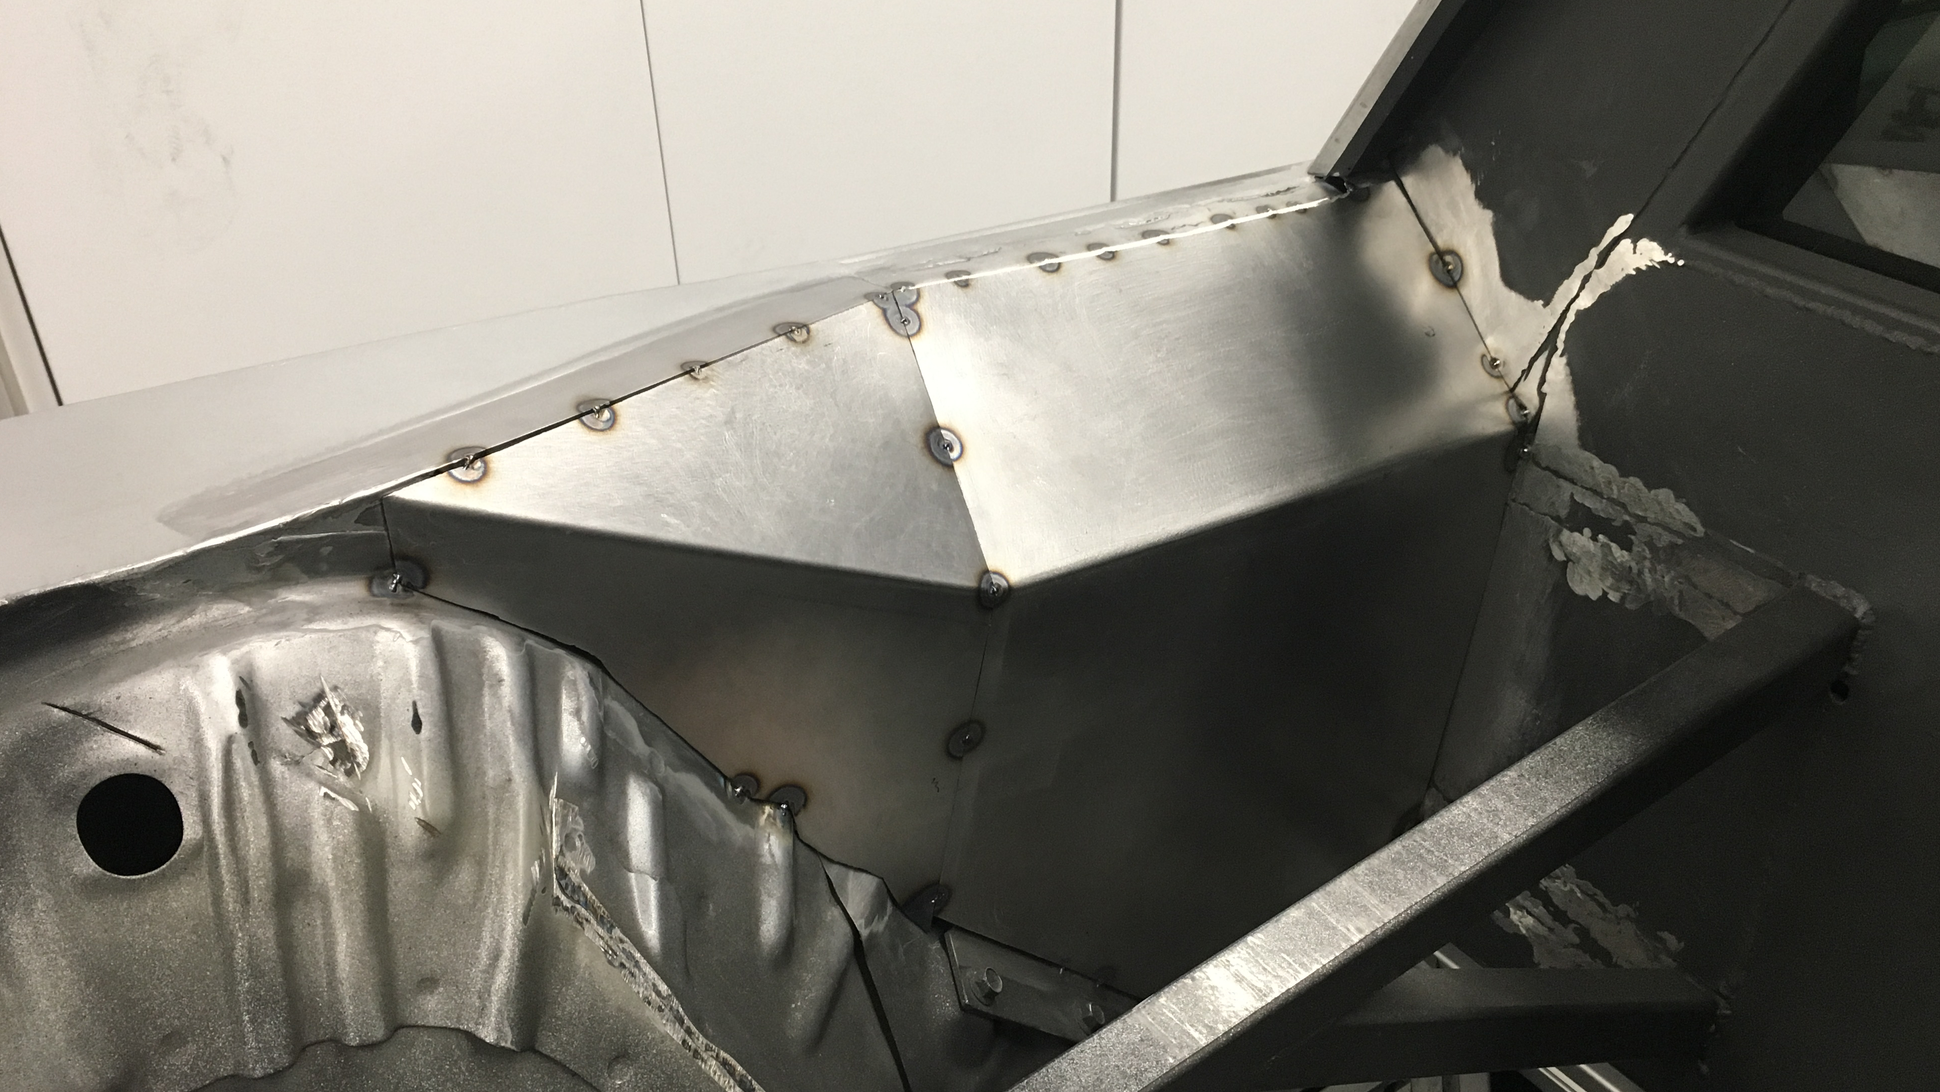
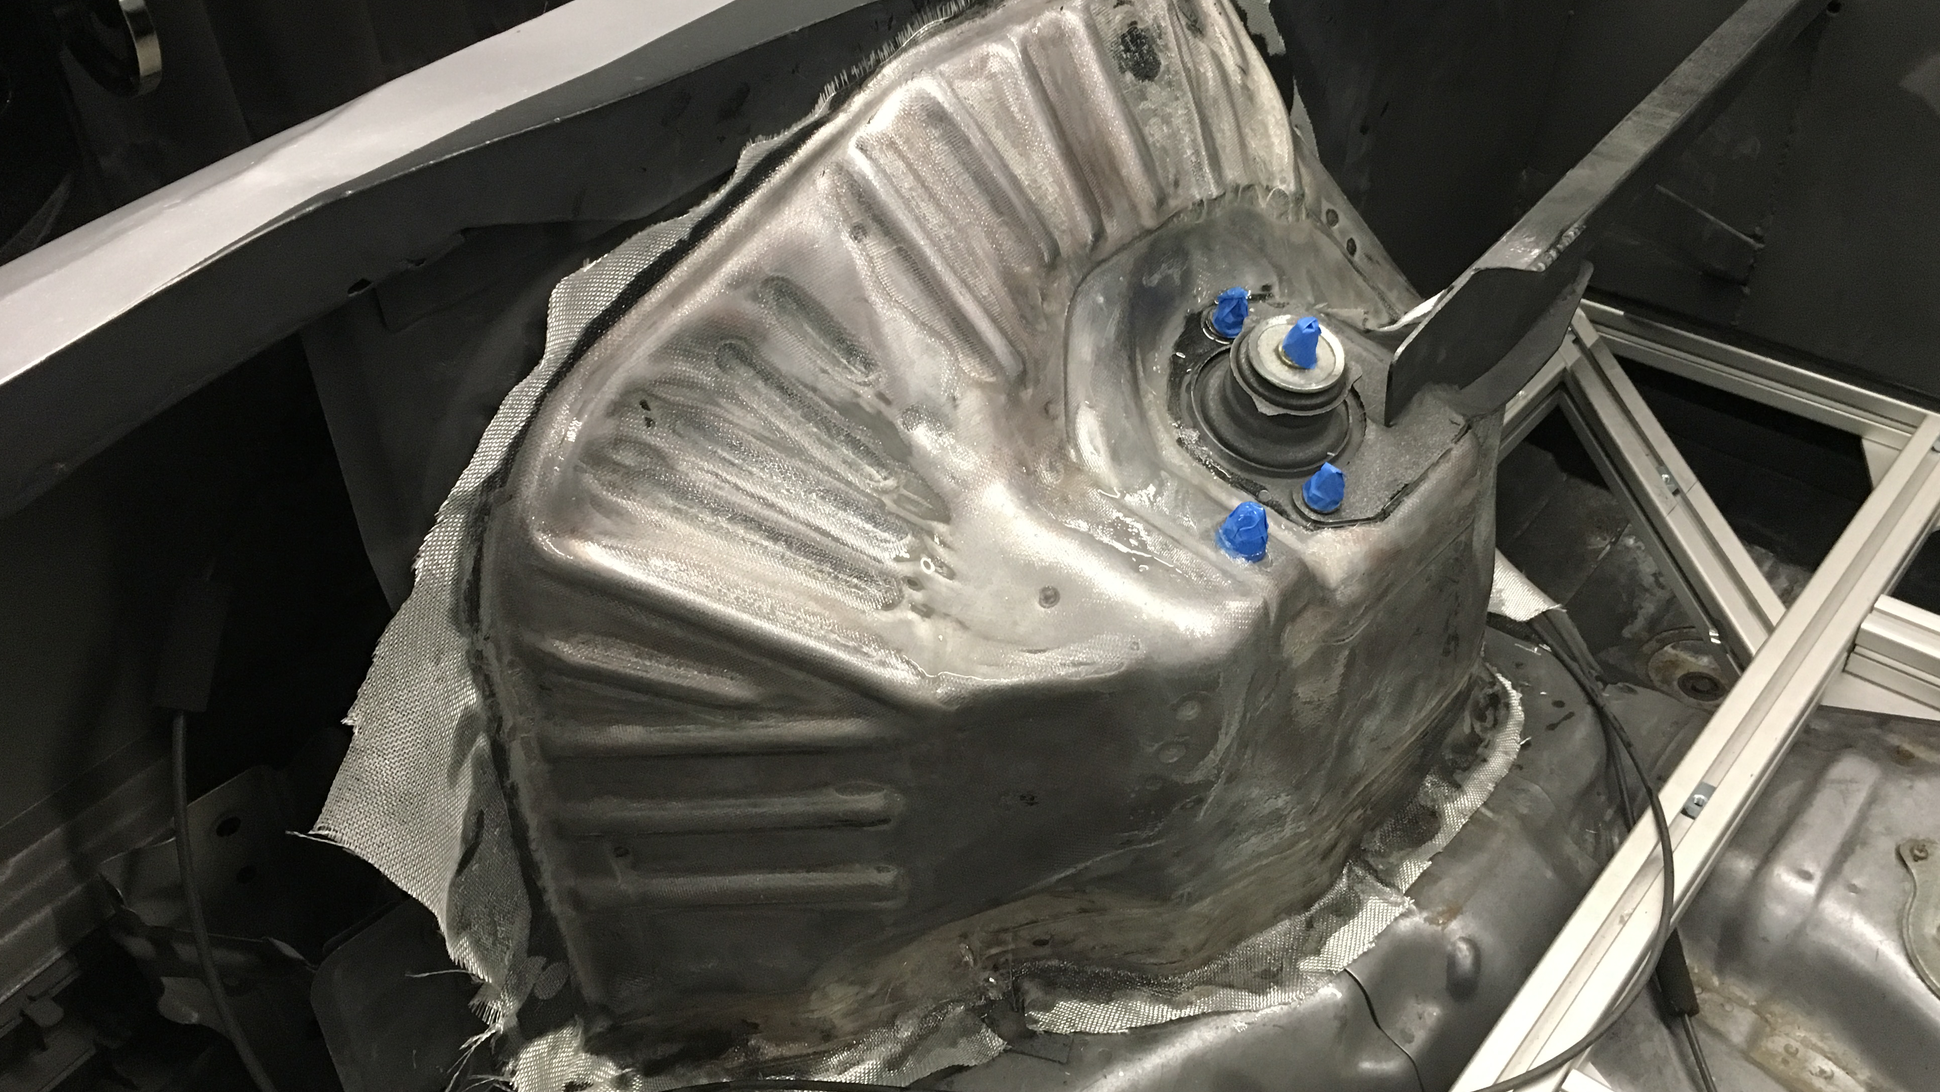
When both sides were fully welded and cleaned up, I set about trimming off excess sheetmetal and welds on the wheel arches in order to get a smoother basic shape for the lay up.
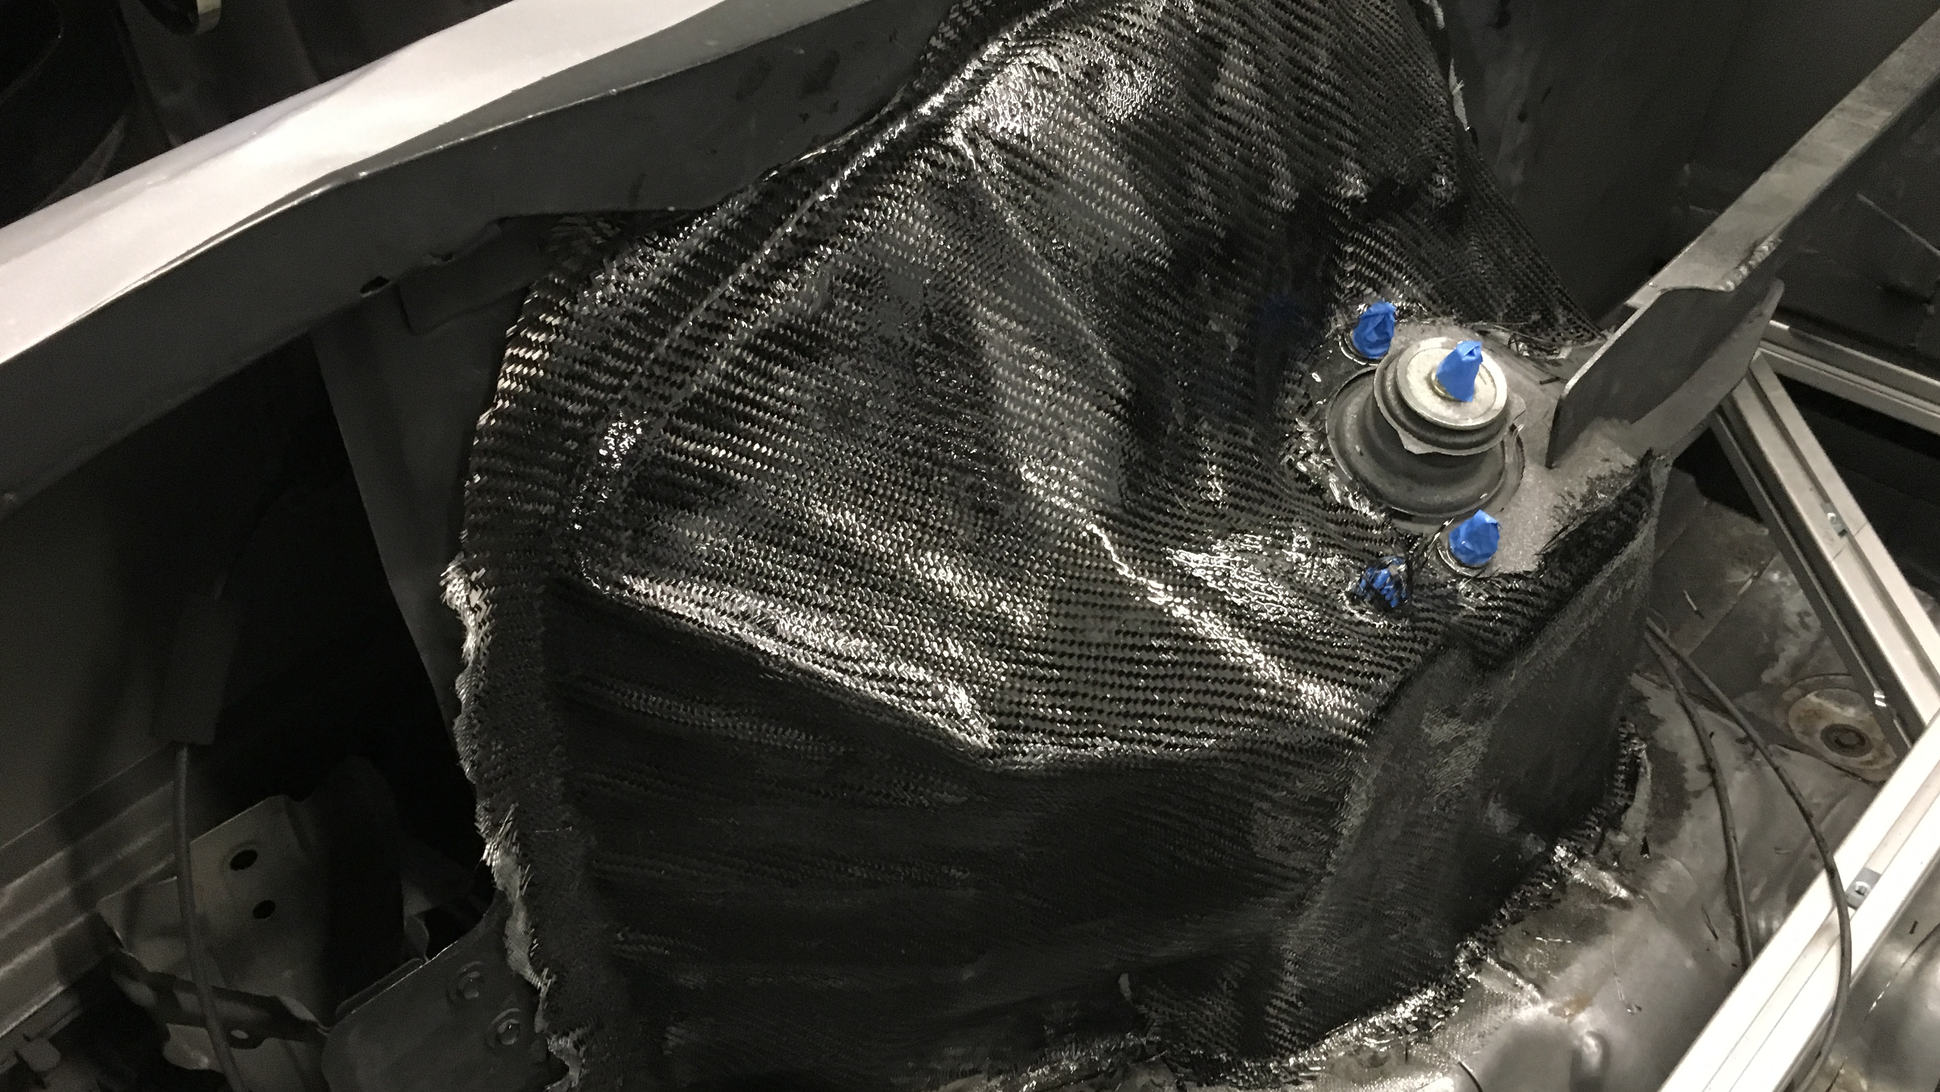
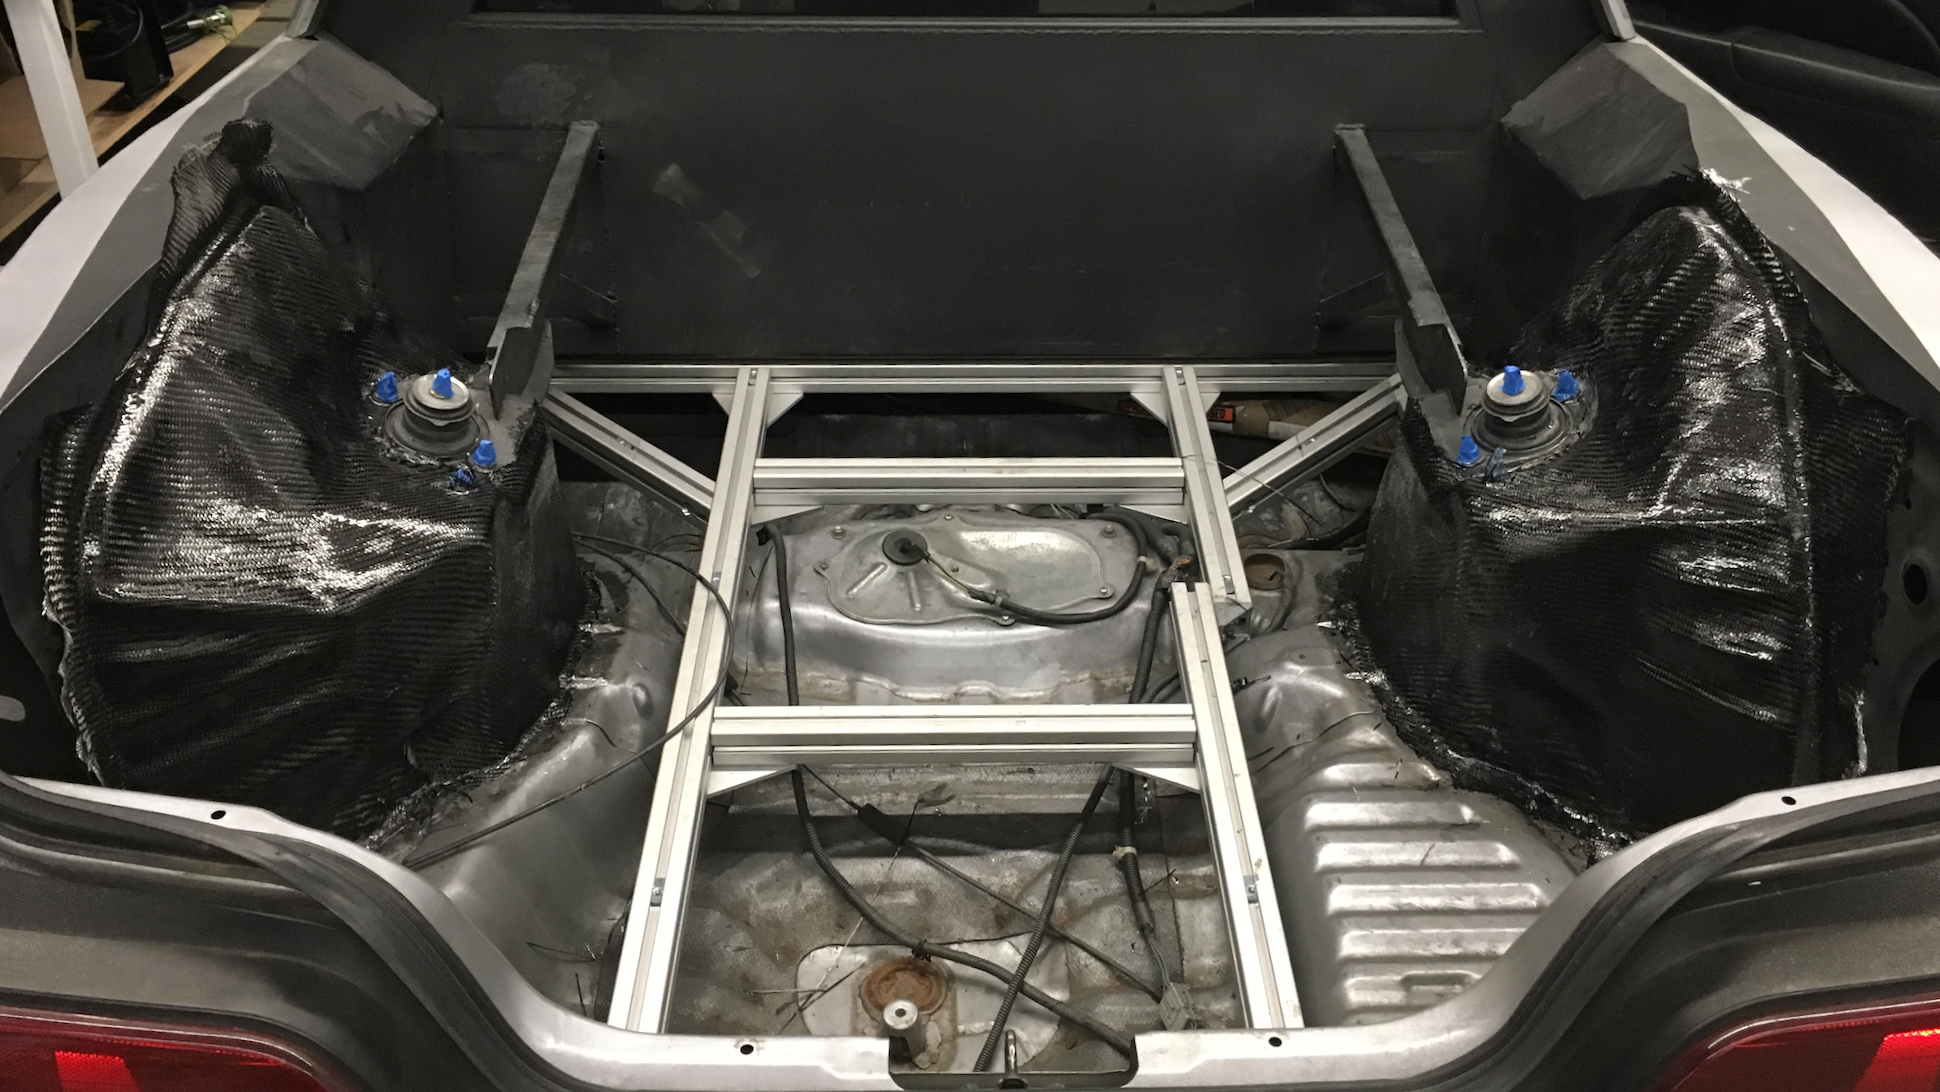
Carbon fiber cloth is fairly stiff and flakes a lot at the edges, so I laid down a first layer of fiberglass (E-glass) as a foundation:
Followed by two layers of carbon fiber, and finally a top coat of epoxy. (The pic below only shows the first layer of carbon fiber.) The cured composite was then trimmed extremely carefully using a Dremel wheel.
Here you can also see how the base of the bed was laid out: 80/20 aluminum channel anchored to the forward wall and the spare tire compartment, defining a plane pretty much level with the original trunk floor. I wanted the bed to be easy to dismantle to facilitate future modifications - say, if I wanted to install an electric rear drive and batteries to make a hybrid electric AWD setup (!).
Earlier on in the project I’d mulled over making a functional flip-down tailgate, but that would have involved a huge amount of custom work on the taillights, gate, hinges and bumper. The Prelude also has a very high rear sill, so cutting through that would necessitate even more structural bracing. Figured I’d wait for someone to rear-end me before embarking on that project.
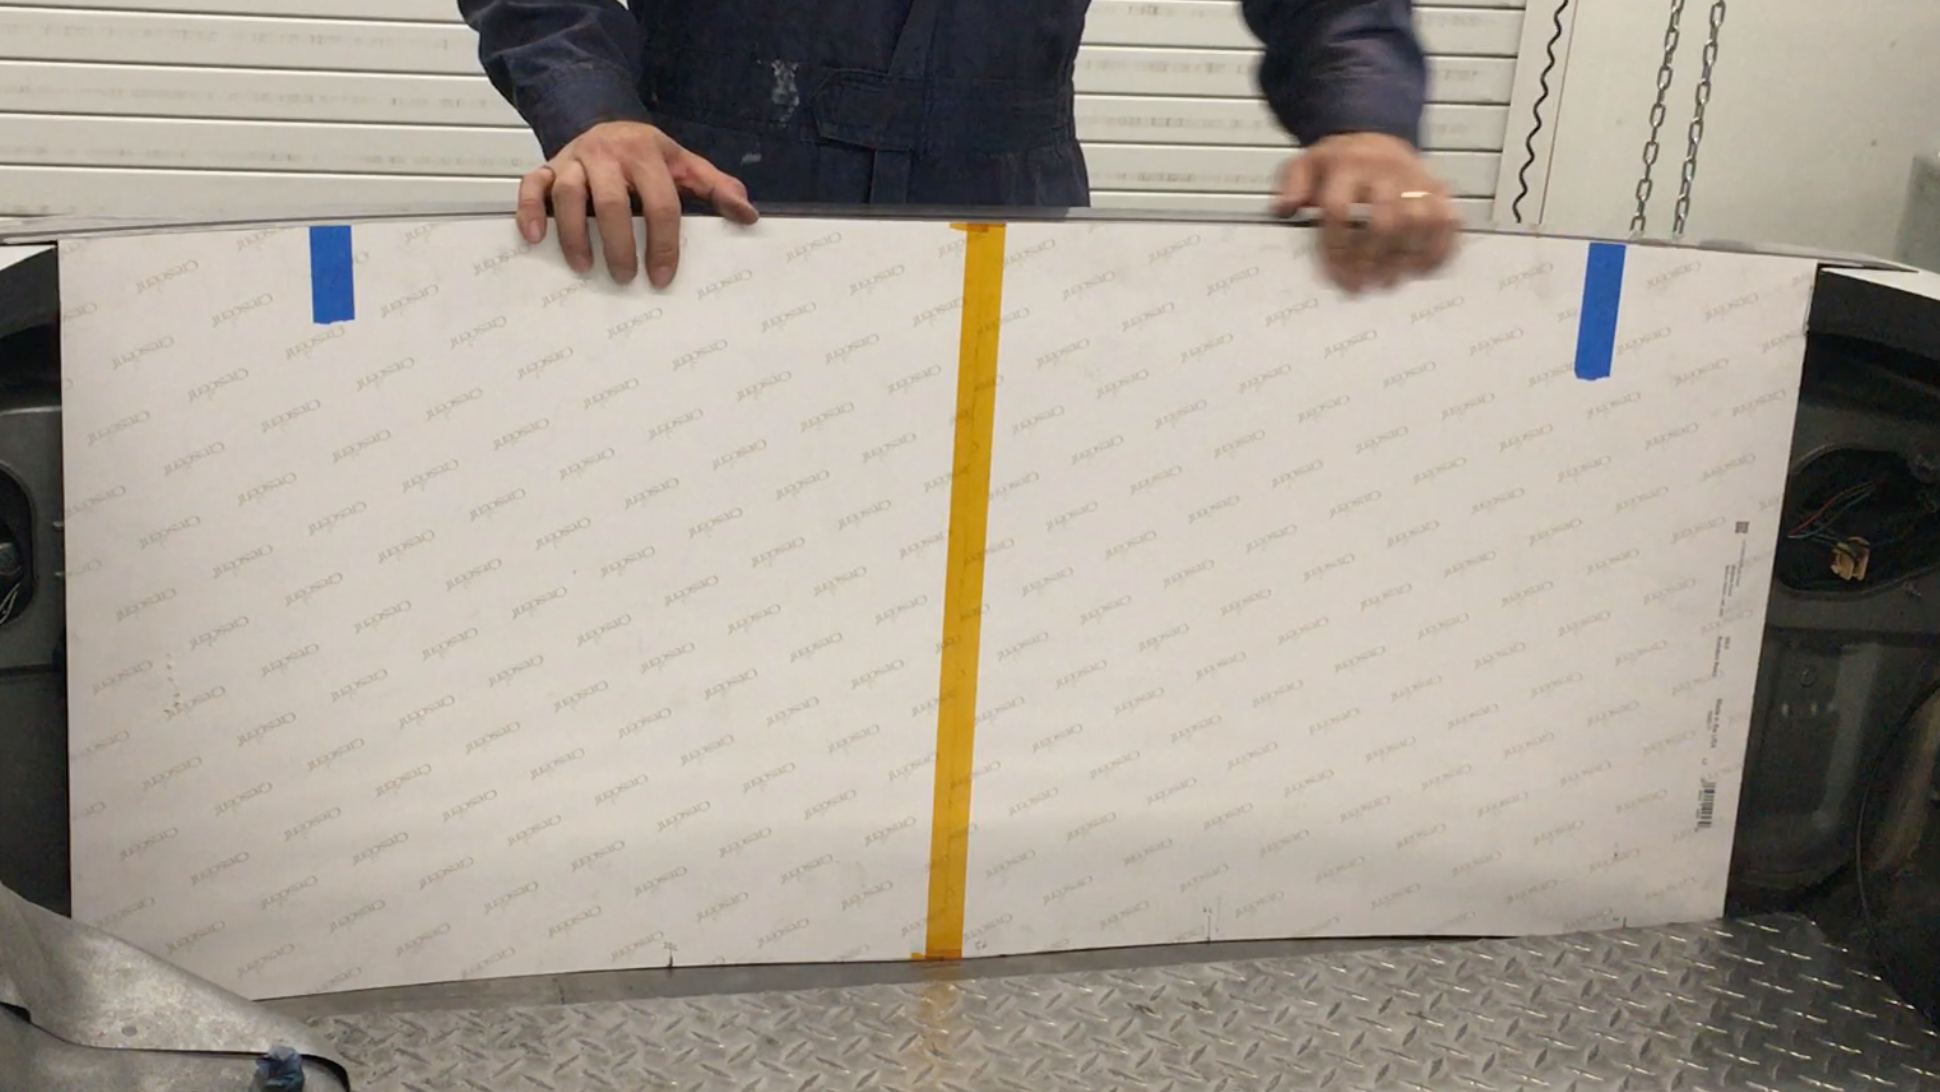
For now, truncating the trunk would do. This is me shaping another matte board template for the rear wall of the bed:
And the final wall, welded to the sawn-off trunk and also to a panel that tucks under / bolts down to the diamond plate. Here you also see bolt-on close-off panels that I fabbed for the rear corners of the bed - they need to be removable to preserve access to the tail lights.
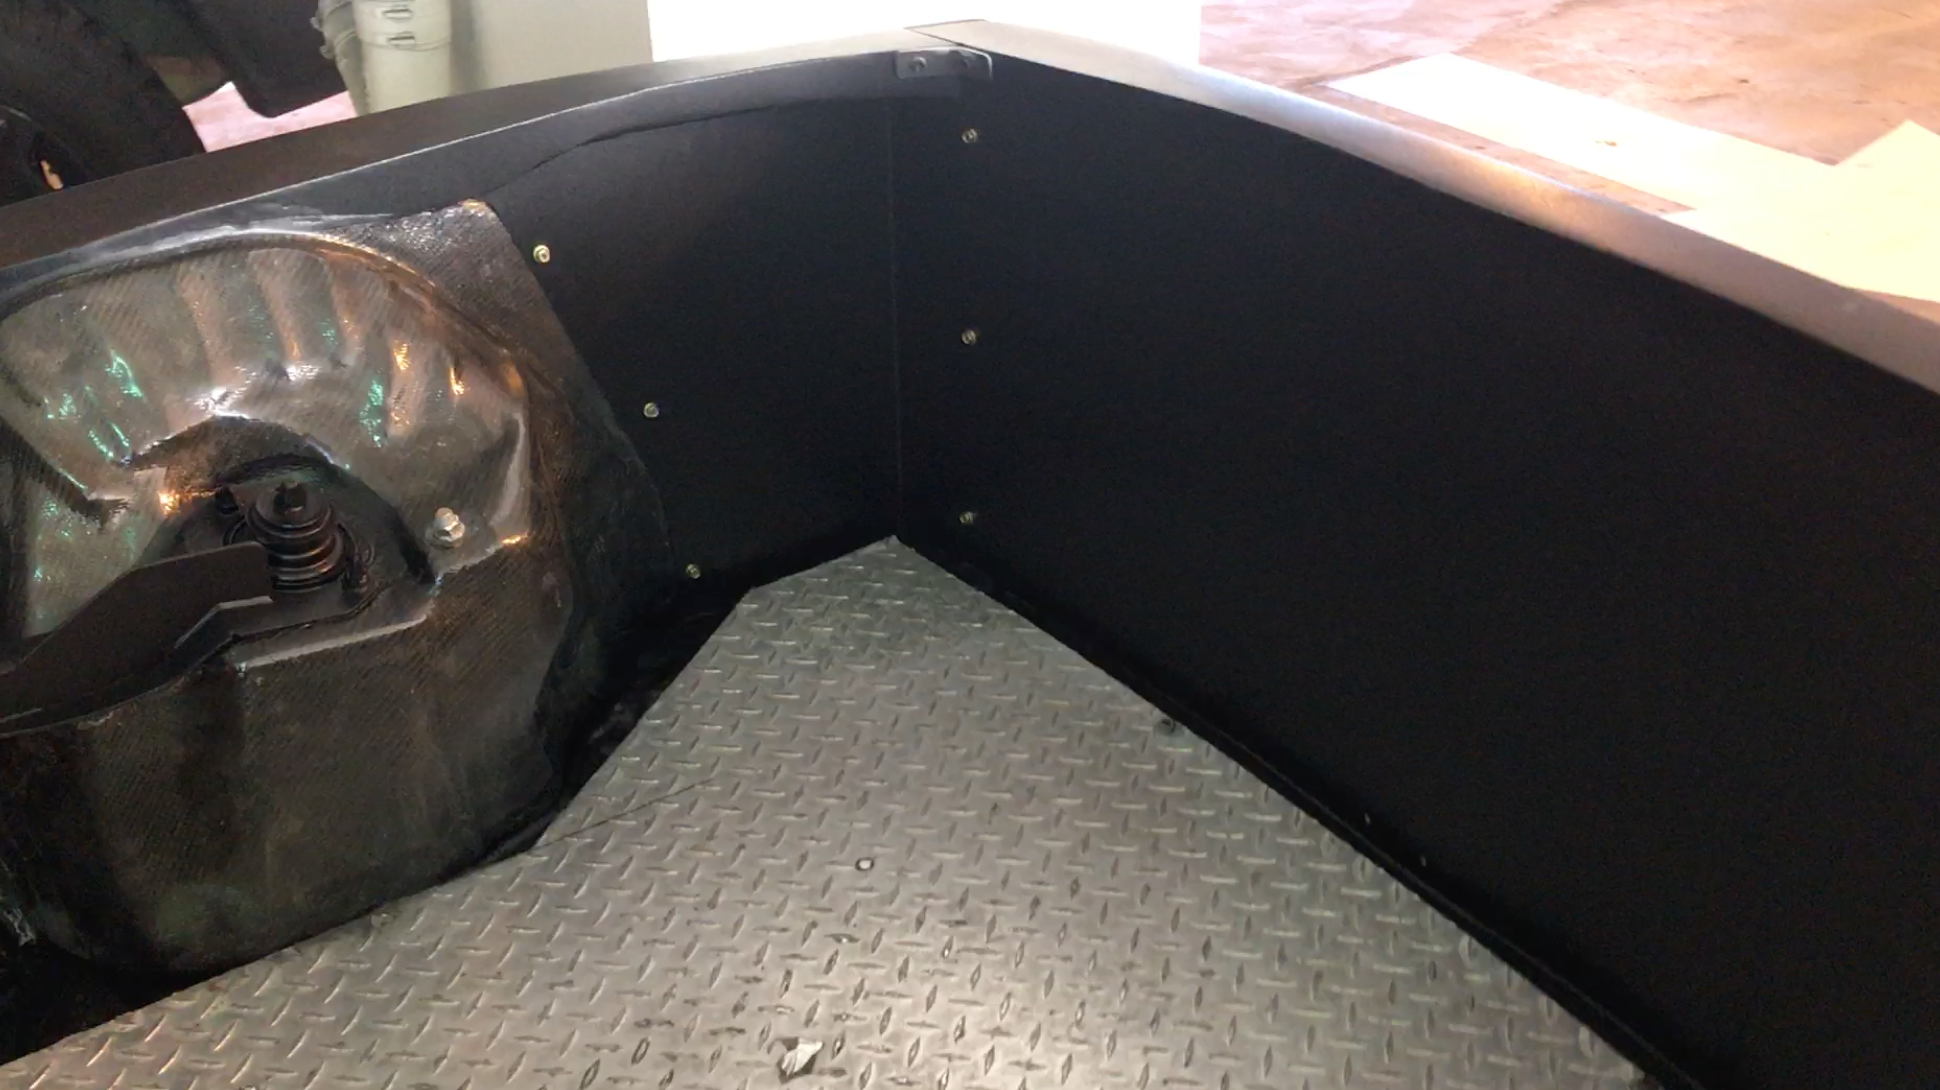
Not forgetting the additional diamond plate panels for the front corners of the bed.
With the bed finally done, I could shift attention to the fun questions: paint? wrap? colors? bodykits? And soon, I would come to regret not spending more on a better donor car...
 AestheticsInMotion
> deviantcustoms: OEM++ builds
AestheticsInMotion
> deviantcustoms: OEM++ builds
05/16/2018 at 10:52 |
|
This is such a fun project to read about
 sony1492
> deviantcustoms: OEM++ builds
sony1492
> deviantcustoms: OEM++ builds
05/16/2018 at 10:53 |
|
Is there anything special to working with carbon fiber? Most of what I’ve read involves vacuum sealing
 CarsofFortLangley - Oppo Forever
> AestheticsInMotion
CarsofFortLangley - Oppo Forever
> AestheticsInMotion
05/16/2018 at 11:01 |
|
Makes me feel bad about the embarrassing amount of time it takes me to do basic things on my truck
 Montalvo
> deviantcustoms: OEM++ builds
Montalvo
> deviantcustoms: OEM++ builds
05/16/2018 at 12:10 |
|
Awesome material but horrible to work with. Even with masks and decent ventilation I don’t want to know what the resin and carbon dust is doing to my insides.
|
deviantcustoms: OEM++ builds
> CarsofFortLangley - Oppo Forever
05/16/2018 at 12:17 |
|
Well, this post alone represents about 70 hours of work... since I’m arranging the posts partly by theme, some posts end up representing more work than others.
|
deviantcustoms: OEM++ builds
> sony1492
05/16/2018 at 12:26 |
|
Vacuum bagging is meant to squeeze out the excess epoxy and promote bonding between the laminate layers. If you’re not aiming to maximize the strength to weight ratio, you can get by with just the basics - a pair of good shears and many paintbrushes. I used stiffer bristle brushes for wetting out the layers and foam brushes to apply the top epoxy coat.
|
deviantcustoms: OEM++ builds
> AestheticsInMotion
05/16/2018 at 12:28 |
|
Thanks! It also feels more fun writing about it now, than when I was crouching in various contorted positions trying not to burn or epoxy myself =)
|
AestheticsInMotion
> deviantcustoms: OEM++ builds
05/16/2018 at 15:12 |
|
Isn’t that the truth? My build has gone slowly with tons of errors both small and large, but writing about it here? Suddenly it all seems like a wonderful time!
 sn4cktimes
> deviantcustoms: OEM++ builds
sn4cktimes
> deviantcustoms: OEM++ builds
05/16/2018 at 17:12 |
|
I’m loving these updates! I want to do this to a boxy car soooooo much.